Service Manager
Setting Up Authentication for OpenID Connect with Microsoft Azure
•Adding a Microsoft Azure Application
•Configuring a Microsoft Azure Application
•Creating a Service Manager Authentication Provider
•Security Considerations When Using Microsoft Azure
Adding a Microsoft Azure Application
If you have not already done so, set up a Microsoft Azure account.
1.Log into https://portal.azure.com.
2.Click Active Directory from the right blade.
3.Create a new Active Directory or use an existing Active Directory.
4.Go to App Registrations and click New Application Registration.

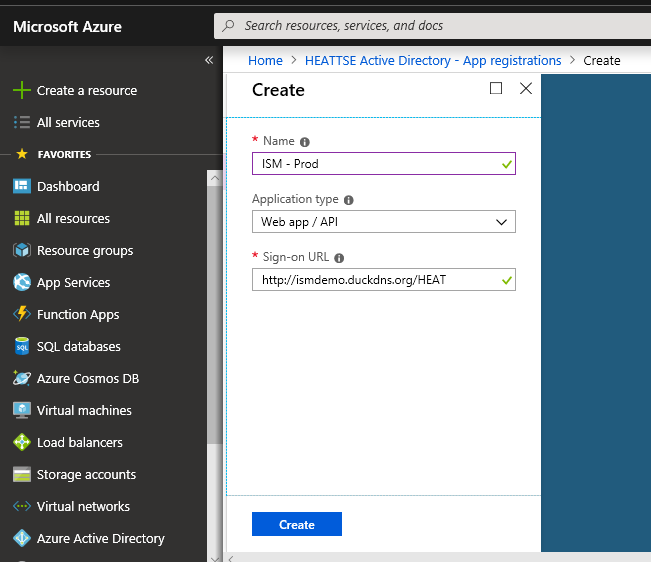
5.Provide a Name for the application, such as "ISM - Prod".
6.Provide the Sign-on URL. This should be the URL that reaches the tenant's login page. For cloud customers, this is typically https://{yourtenantname}.saasit.com and for premise customers this is typically http(s)://{FQDN}/HEAT.
7.Click Create.
Configuring a Microsoft Azure Application
1.After you have created the Microsoft Azure application, you should see a detailed page by clicking Settings.
2.Click Reply URLs and enter a URL consisting of your Login page URL, followed by "/handlers/sso/OIDC/AuthResultHandler.ashx". For cloud customers this is typically "https://{yourtenantname}.saasit.com/handlers/sso/OIDC/AuthResultHandler.ashx" and for Premise customers this is typically "http(s)://{FQDN}/HEAT/handlers/sso/OIDC/AuthResultHandler.ashx"
3.Click Save.

4.Click the Keys section, enter description and select expiration date for the key.
5.Click Save.
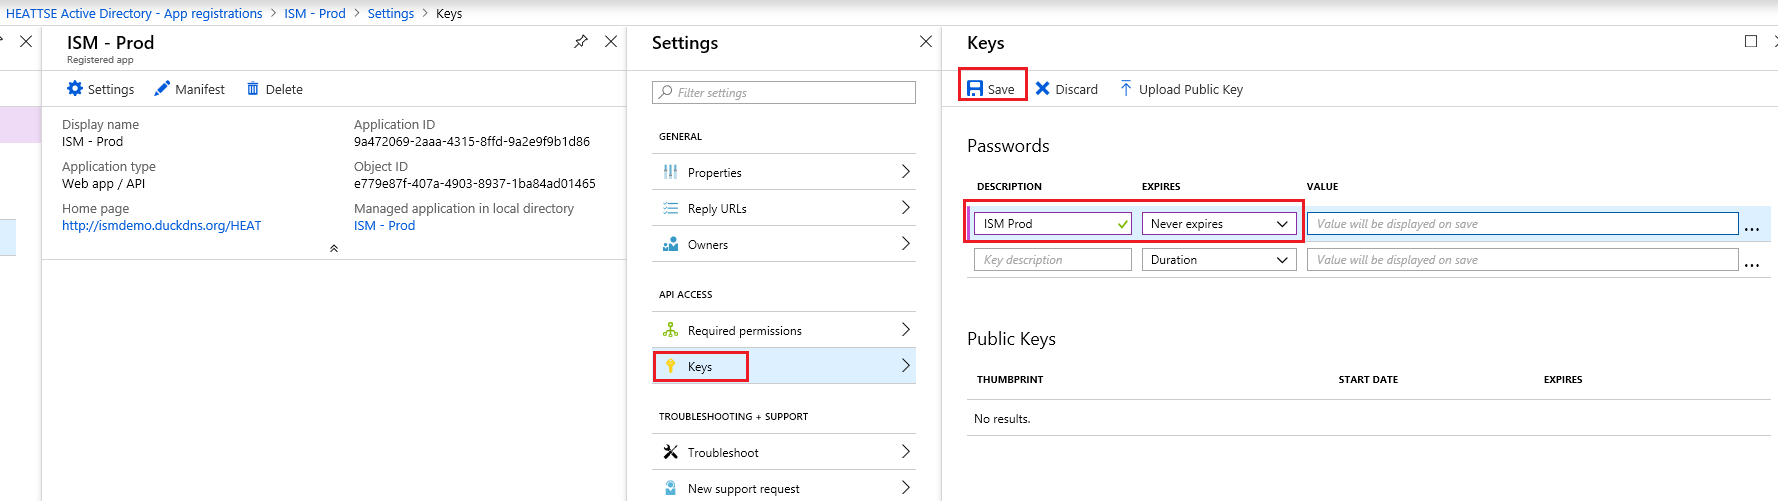
6.Copy and save the KEY value and save it in a secure place. **As soon as you leave this page you will not be able to view this key again. You must capture it now**.
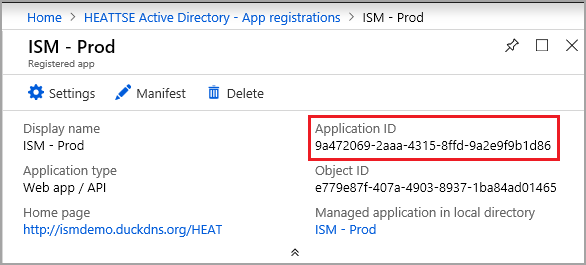
7.Find the Application ID in the details panel on the left and copy it to the secure location with the KEY value. You can find this later but now is a good time to capture it along with your key from the prior step.
8.Click Required Permissions and select your Windows Azure Active Directory. Grant permissions to Read directory data and Read all users' full profiles, then click Save. Sign in and read user profile should already be checked.
(Note you will need admin rights on the Azure AD to make this change).

9.Click the Active Directory link in the breadcrumbs at the top, then click Endpoints.
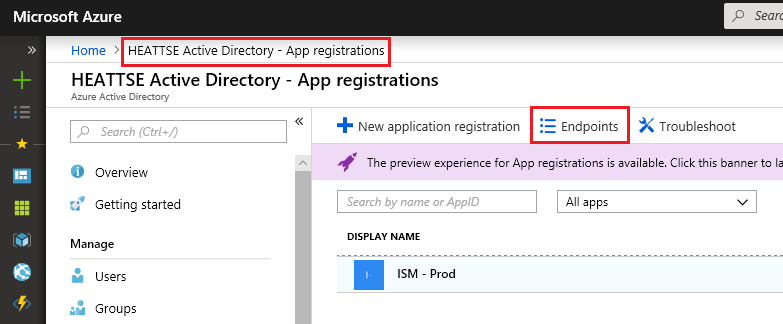
10.Copy the OAUTH 2.0 AUTHORIZATION ENDPOINT and the OAUTH 2.0 TOKEN ENDPOINT and save them with the Application ID and KEY value from the steps above.
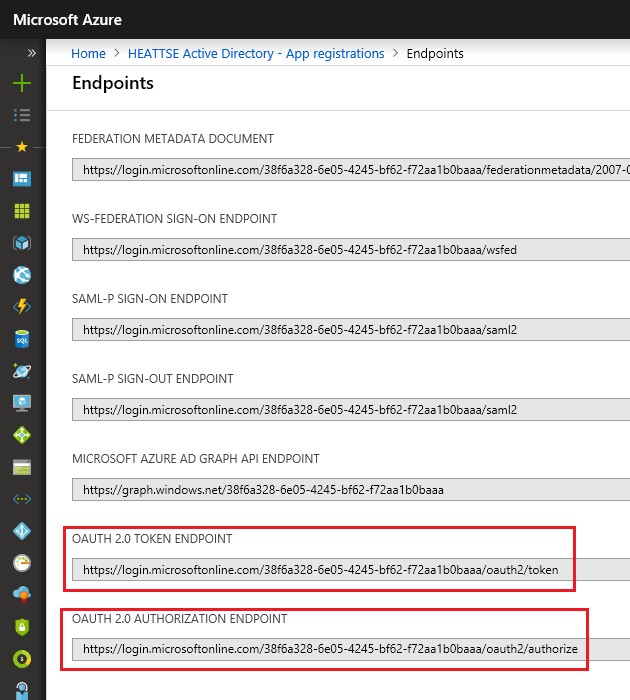
11.Find your Active Directory ID by going to Properties on your Azure Active Directory.
Note this should correspond to the hash seen in the middle of the endpoint URLs above.
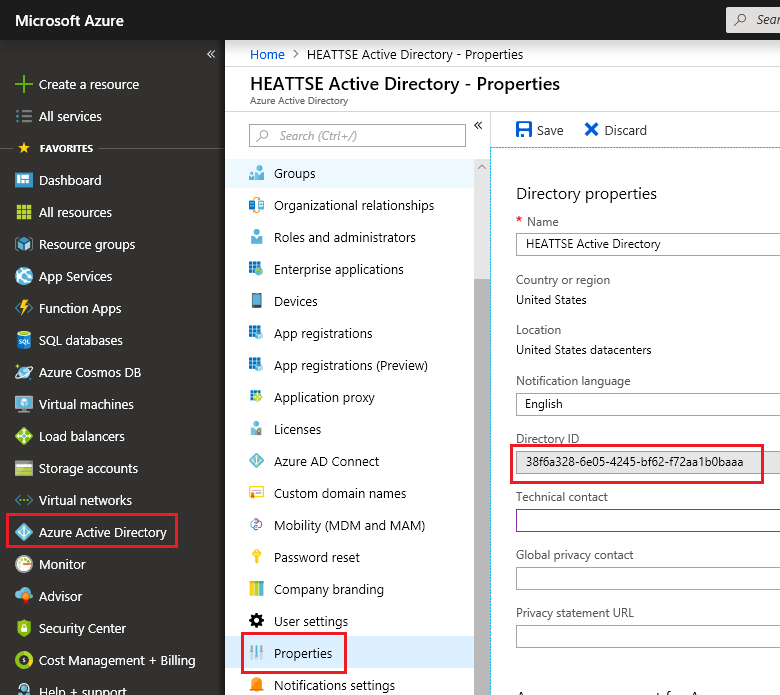
You should now have the follow items documented from your Azure Portal that we will need in the next steps: KEY Value, Application ID, Token Endpoint URL, Authorization Endpoint URL, and Active Directory ID.
Creating a Service Manager Authentication Provider
1.From the Configuration, click Configure > Security Controls > Authentication Providers to open the Authentication Providers workspace.
2.From the New Record Menu drop-down list, select New OpenID Connect.
3.Enter data into the fields.
| Field | Description |
|---|---|
| Default |
Specifies if this authentication provider is called. Automatically set by the application. You change this in the list. To make this authentication provider as the default value, you must first change the default setting for all other authentication providers to false and then change the default setting for this authentication provider to true. |
| Disabled | Specifies if this authentication provider is disabled. |
|
Name |
The name of the OpenID Connect provider. This can be any value you want and will get displayed to the end users on the login page. |
|
Authentication URL |
Enter the value from the OAUTH 2.0 Authorization Endpoint. Service Manager must be able to initiate an outbound HTTPS (port 443) connection to this URL. |
| Token Verification URL |
Enter the value from the OAUTH 2.0 Token Endpoint. NOTE: Service Manager must be able to initiate an outbound HTTPS (port 443) connection to this URL. |
|
Logout URL |
Enter: https://login.microsoftonline.com/{Active-Directory-ID}/oauth2/logout. {Active-Directory-ID} was captured from Azure in step 11 above. |
| Session Renewal URL |
The URL to request to renew the session. If this field is empty, the application uses the value of the Authentication URL field. For Azure AD, this can normally be left blank. NOTE: Service Manager must be able to initiate an outbound HTTPS (port 443) connection to this URL. |
| Client ID | Enter the Microsoft Azure client ID. This is the Application ID that was captured for Azure in step 7 above. |
| Client Secret | Enter the key value from your Microsoft Azure application. This is the KEY that was captured in step 6 above. |
| OIDC Hosted Domain | Not used in this release of Service Manager. |
| OIDC Realm | Not used in this release of Service Manager. |
| Certificate URL |
The URL of the certificate used to verify the signature of the authentication response. Currently, Azure uses this URL: https://login.microsoftonline.com/common/discovery/keys NOTE: Service Manager must be able to initiate an outbound HTTPS (port 443) connection to this URL. |
| Certificate Issuer |
The name of the certificate authority who issued the certificate. Enter this hyperlink: https://sts.windows.net/{Active Directory ID/. {Active-Directory-ID} was captured from Azure in step 11 above. |
| Expiration Date |
The expiration date of the certificate. Not used in this release of Service Manager. |
| Auto Provisioning | Check to enable. |
| Profile Information URL |
Not used for Microsoft Azure. |
| Auto Provision Role |
Role associated with the new user. |
| Auto Provision Status |
Status of the new user. |
| Auto Provision Team |
Team associated with the new user. |
| Auto Provision User Business Object |
Type of user record to create. Can be either employee or external contact. |
4.Optional. To be redirected to an application URL after successful logout, append ?post_logout_redirect_uri={Sign On URL} to the logout URL. For example, enter https://login.microsoftonline.com/{Active-Directory-ID}/oauth2/logout?post_logout_redirect_uri=https://my_tenant1.saasitdev.com/handlers/sso/OIDC/AuthResultHandler.ashx.
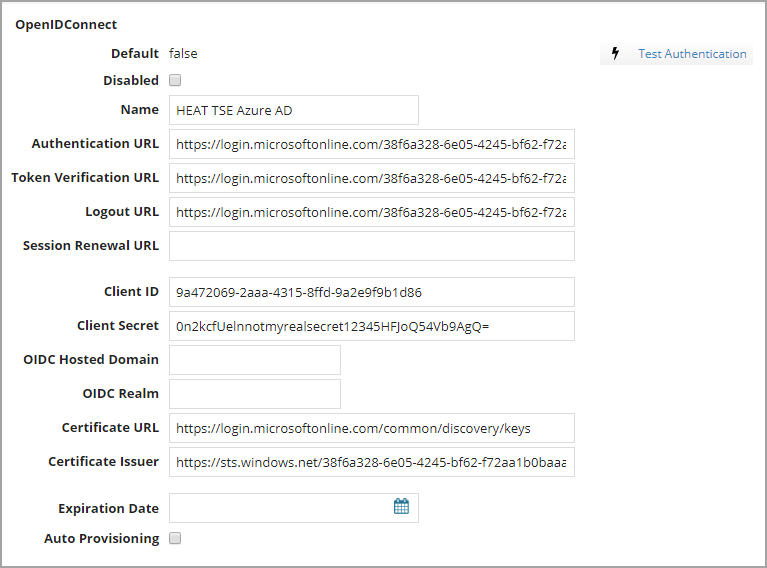
5.Click Save. Your ISM auth provider page should look similar to the screenshot below:
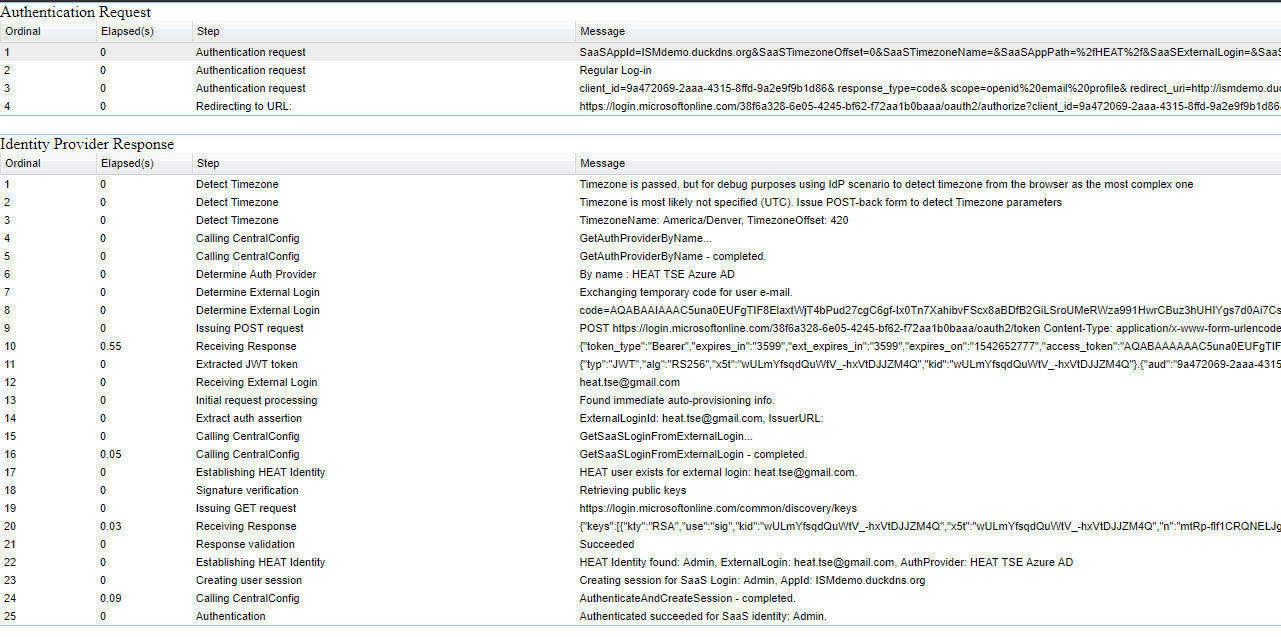
6.To verify the authentication, click Test Authentication. (note you must have an Employee record with an appropriate External Auth linking it to this provider before the test will be fully successful).
•If a line appears stating "Receiving External LoginUse Sub as external login as e-mail is not available at this step."
•You may also be prompted to consent to the needed access and will need to log in as an Azure AD admin to accept on behalf of your organization.
•A successful test will look similar to the following screenshot:
Security Considerations When Using Microsoft Azure
Service Manager application servers must be able to initiate outbound connections to the following endpoints:
•Token verification URL
•Certificate URL
All URLs have the following URL pattern: https://login.microsoftonline.com/*.
Was this article useful?
Copyright © 2019, Ivanti. All rights reserved.